Lab 1.1 - Install VS Code, Git and sfdx-hardis
Level: 1 Contributor basics
Time: ~15 min
You will: turn a plain computer into one that can do Salesforce DevOps, without typing a single command.
The situation
Your first morning on any Salesforce team, this one or a real one. Before you can be given a ticket, five things have to be on your machine, and the last of them installs most of the rest for you.
This lab stands on its own
It is the same list whether you are here for the course or joining a project that already has a pipeline, and it does not care which git provider that project uses: GitHub, GitLab, Azure DevOps and Bitbucket all work the same from here. If somebody sent you here to get set up before your first day, finish this lab and stop. Lab 1.2 is where the training-specific part starts: free Salesforce orgs, a training repository, fictional data. None of that belongs on a real project.
Before you start
- A computer where you can install software, and permission to do so
Steps
1. Install VS Code and the extension
First Git. Git is the tool that records every version of a project and moves it between your laptop and wherever your team keeps the project, and everything else in this course sits on it. You will never have to type a Git command: the extension runs them for you, and shows you which one it ran. The download page offers your operating system at the top: on Windows take Click here to download (1), the 64-bit standalone installer.
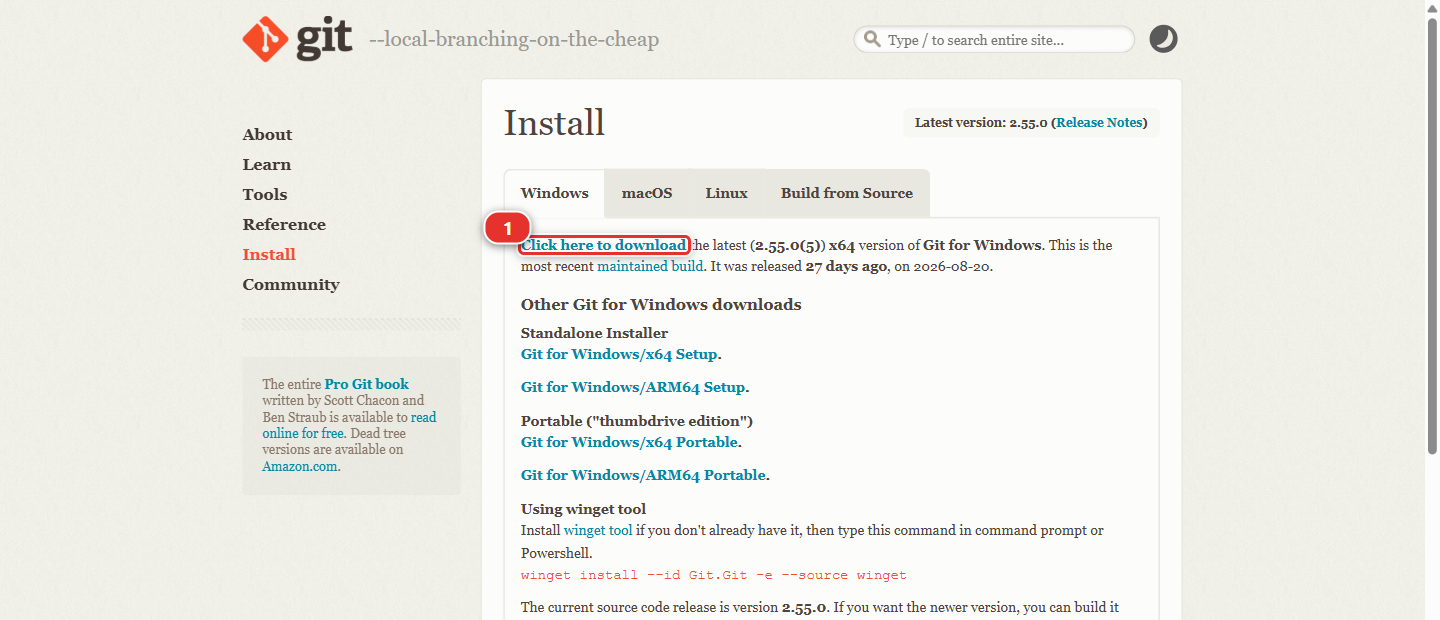
Accept every default the installer offers, and on Windows that matters more than it sounds. The defaults include Git Bash, a Unix-style terminal that comes with Git, and sfdx-hardis uses it: several of the commands the extension runs for you are shell commands that the Windows command prompt does not understand. If you untick the Git Bash components, parts of this course fail with errors that look like nothing to do with Git.
Two screens are worth reading rather than clicking through:
- Select Components: leave Git Bash Here and Git GUI Here ticked
- Adjusting your PATH environment: keep the recommended middle option, Git from the command line and also from 3rd-party software, so VS Code can find Git
macOS and Linux already have a Unix shell, so there is nothing to choose there.
You may already have it
Plenty of machines do. Install it anyway: the installer recognises an existing Git and offers to update it. The Setup panel in step 2 checks it as well, and tells you if it is missing.
Checking Git Bash is there, on Windows
Right-click any folder: the menu should offer Open Git Bash here. In VS Code you will also find Git Bash in the terminal's dropdown, next to PowerShell. If neither shows up, run the Git installer again and keep the defaults this time.
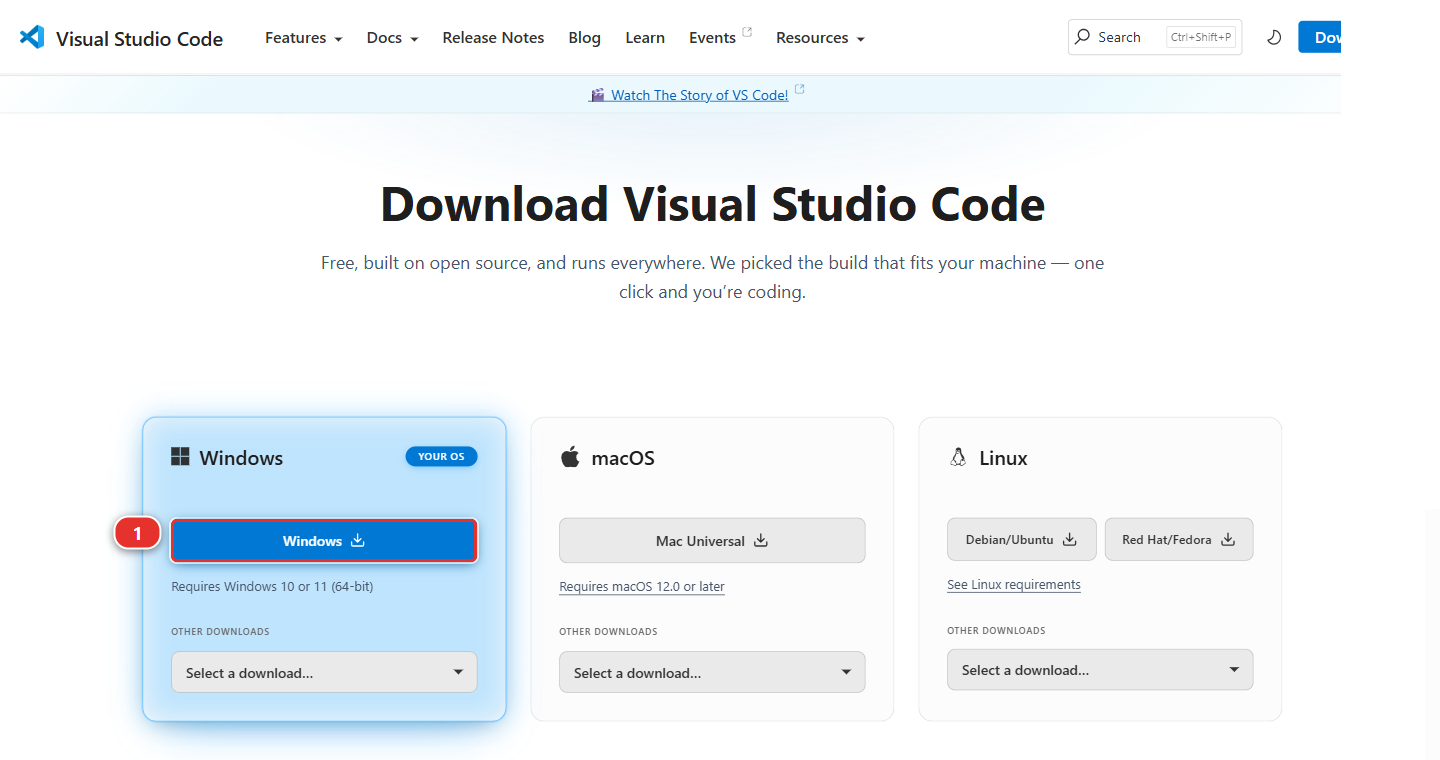
Then open Visual Studio Code and take the download for your machine. On Windows that is the Windows button (1); the two cards next to it hold the macOS and Linux builds.
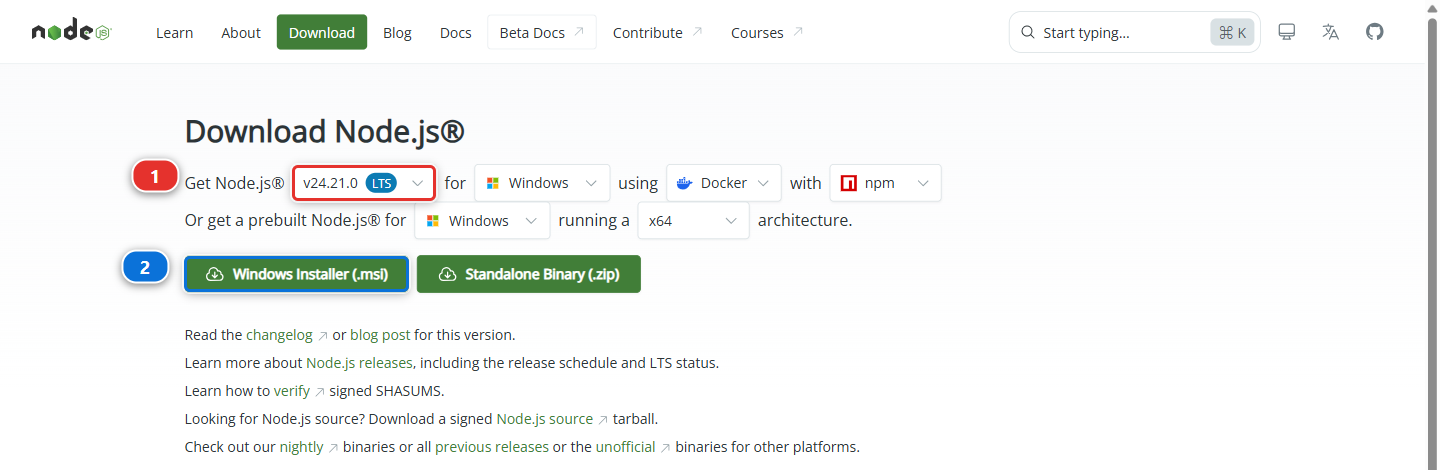
Then Node.js, version 22 at the least, 24 recommended. Two things to get right on that page:
- the version selector (1). The one marked LTS is the safe choice, as long as it reads 22 or higher
- Windows Installer (.msi) (2), or the equivalent for your machine
Both are next-next-finish installers.
Restart VS Code after installing Git or Node.js
Both installers add themselves to the PATH, the list of places your machine looks for a command. A program only reads that list when it starts, so a VS Code that was already open when you installed them still cannot find them, and the Setup panel in step 2 reports them missing even though they are there. Close VS Code completely, windows and all, and open it again.
The same applies to a terminal you already had open.
Then open VS Code and install the extensions. The Extensions icon (1) sits in the narrow bar
down the left, and looks like four small squares with one lifted away. Click it, type hardis in
the search box (2), and click Install on SFDX Hardis Extension Pack for Salesforce, by
Cloudity (3), published by Nicolas Vuillamy.
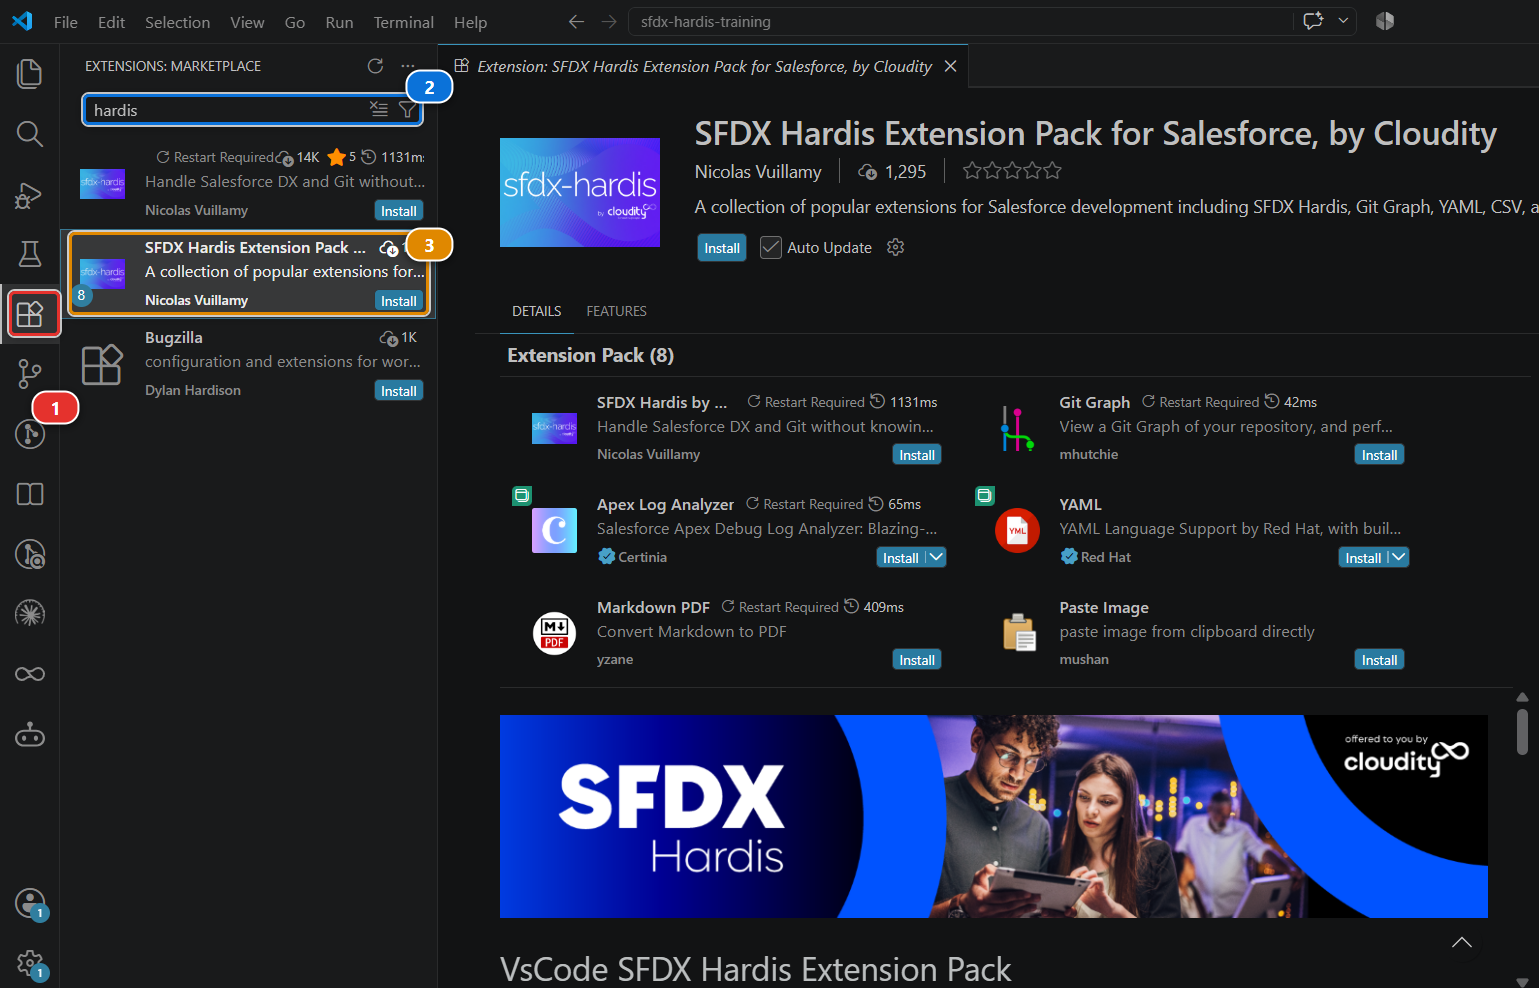
The pack installs sfdx-hardis itself along with the tools that go with it: Git Graph, which draws your branches, the YAML and Markdown support the configuration files use, and the Apex log viewer. Later levels use them, so take the pack rather than the single extension above it.
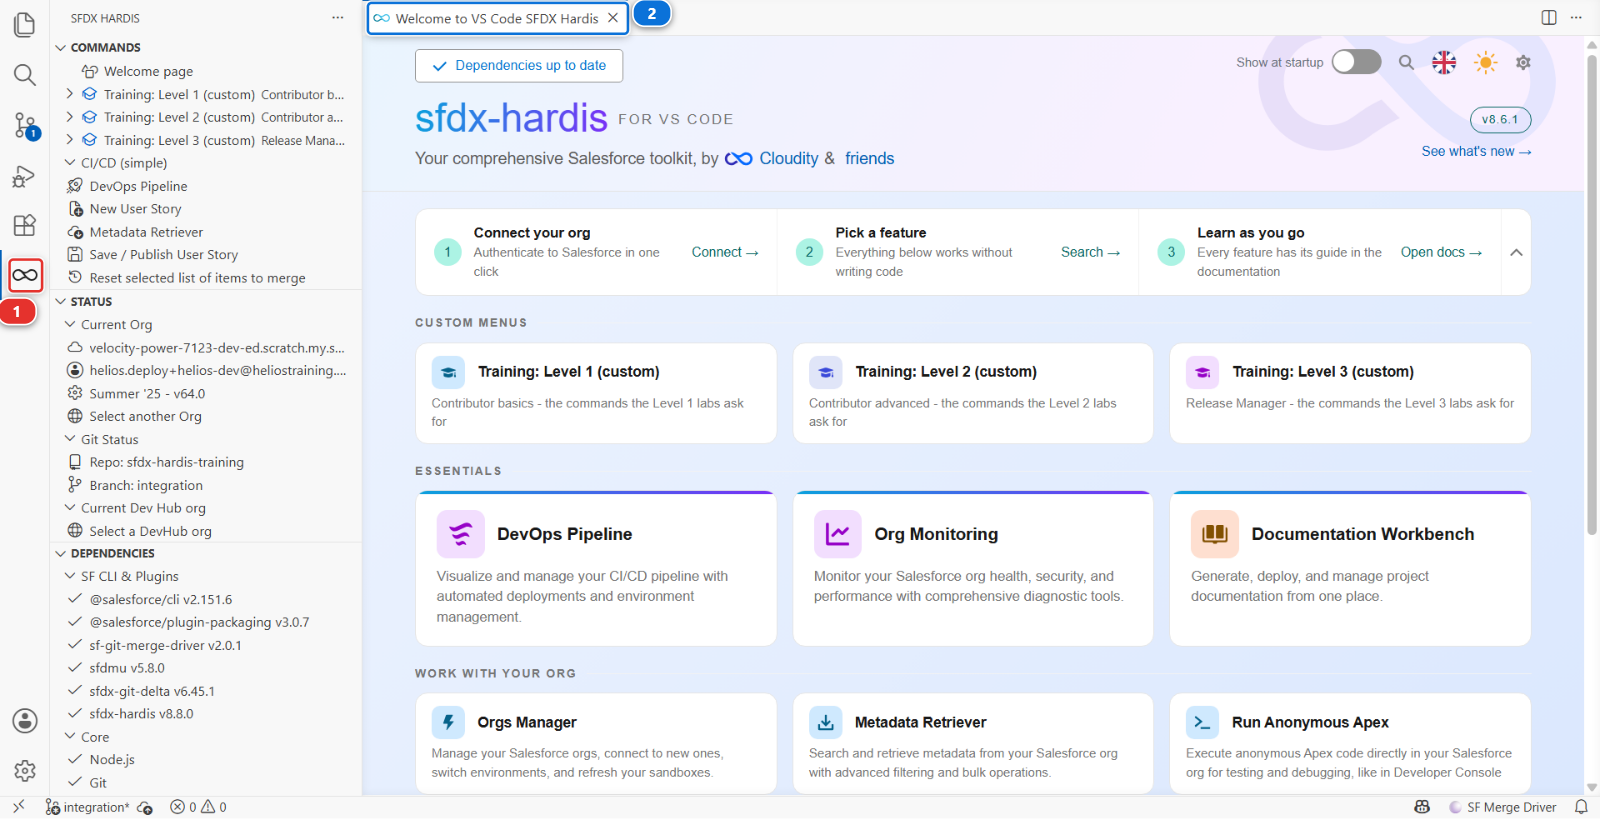
A new icon appears in the left bar (1). Click it: the Welcome tab (2) opens, and that tab is where every lab of this course starts.
2. Let the Setup panel install the rest
You need the Salesforce CLI and a few plugins. You are not going to install them by hand: the extension has a panel that checks what is missing and installs it.
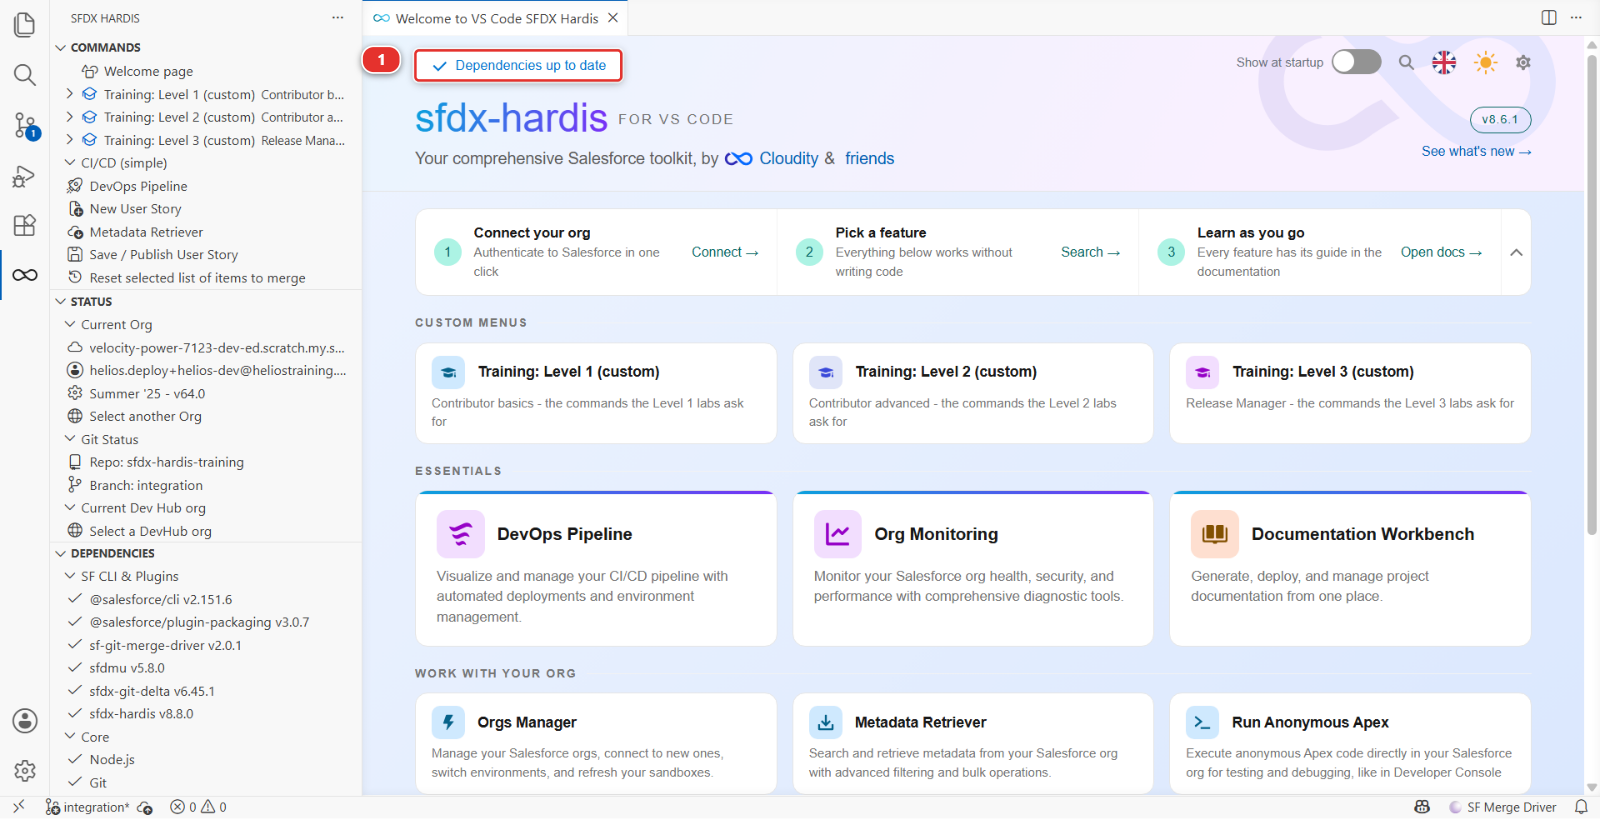
On the Welcome page, the button at the top left of the header band (1) opens the Setup panel. There is no card called Setup: the button is labelled with the state of your dependencies, so it reads Check in progress while it is still looking, then either Dependencies up to date or N update(s) needed. Hover it and the tooltip says Open Setup. Wait for the check to finish, then click it.
The panel lists every dependency the pipeline needs, with the version you have and the version that is current. The ones worth knowing by name:
- Salesforce CLI - the program every Salesforce tool on your machine talks to
- sfdx-hardis - the add-on that puts the User Story commands into that CLI
- SFDMU - loads and extracts records, which is how your orgs get their data
- sfdx-git-delta - works out what changed between two versions of the project, which is what the deployments send
- Salesforce Extension Pack - the official Salesforce tooling for VS Code
Node.js and Git (3) have a card each as well: the panel checks what you installed in step 1 and says so.
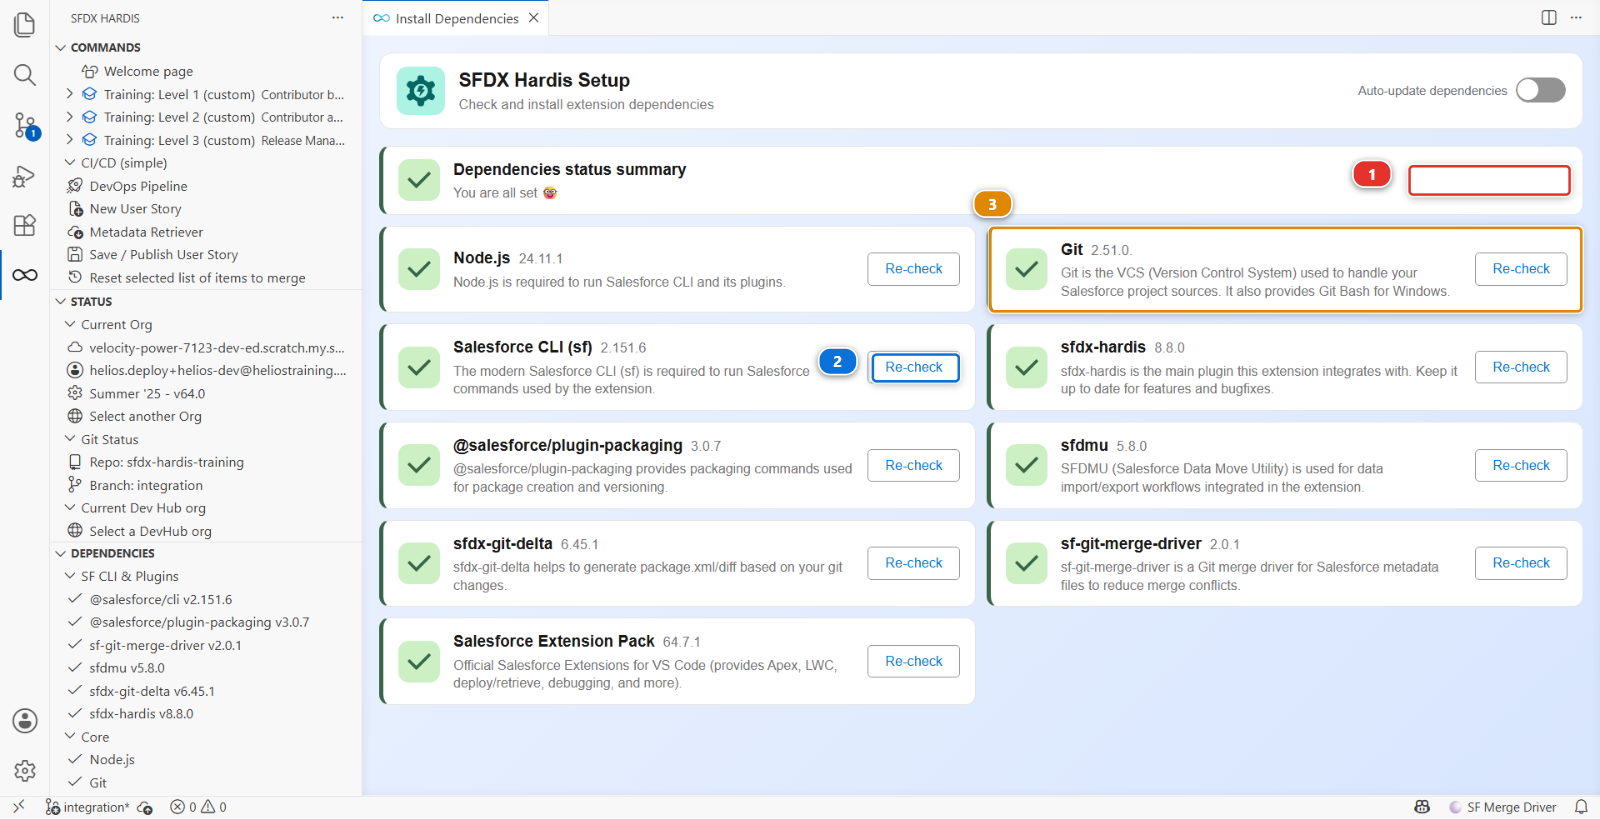
The picture was taken on a machine where everything was already in place, so every card is green and offers nothing but Re-check (2), and the band at the top has nothing to propose (1).
Your first run will not look like that. Anything missing or out of date turns amber and its button reads Install or Upgrade, and the band at the top then carries Run pending installs (1). Use that one: it queues the whole list and reports each item as it finishes.
This takes a few minutes. It is the longest part of this lab and the only one you never repeat.
Restart VS Code once the installs are finished
The Salesforce CLI lands on the PATH as well, so the same rule applies: close VS Code and open it again before you carry on. Then press Re-check on the Setup panel. Anything that was still red for this reason turns green.
Under the hood: what the Setup panel just did
For each missing dependency it ran the plain npm command you would have run yourself, for example:
npm install --global @salesforce/cli
sf plugins install sfdx-hardis
sf plugins install sfdmu
sf plugins install sfdx-git-delta
then re-ran sf version and sf plugins and compared the answers with the versions published on
the npm registry. That comparison is the whole point of the panel: a pipeline breaks in confusing
ways when one person is two major versions behind, and nobody notices until a deployment fails.
What you should see
The Setup panel with nothing left to install:
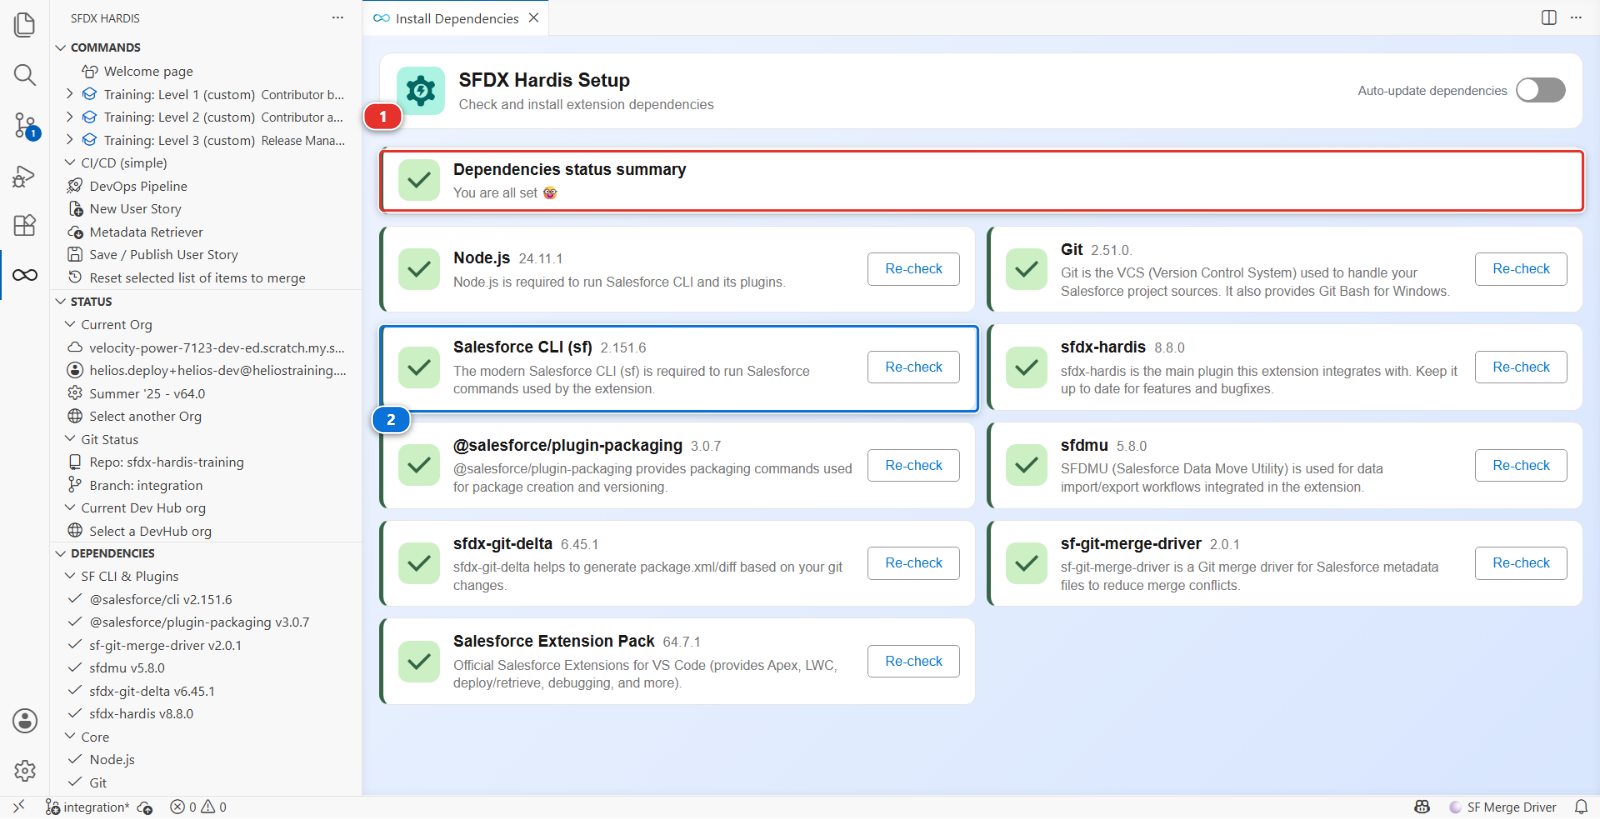
The line to read is the summary at the top (1). It names anything still missing, and missing is the only state that stops you. Every card under it is green, Salesforce CLI (2) included, with nothing left to do but Re-check.
An amber Upgrade on one of them is not a failure: it means a newer version exists, and the button fetches it whenever you feel like it.
That is the whole of this lab. Your machine can now run everything the rest of the course, and every Salesforce project that uses sfdx-hardis, is going to ask of it.
If it goes wrong
The Setup panel says the Salesforce CLI is missing after it installed it. It landed somewhere that was not on the PATH of a terminal that was already open. Close VS Code completely and open it again.
The extension does not appear after installing it. Reload the window: View > Command Palette, then Developer: Reload Window.
The Setup panel shows a red line you cannot clear. Click the line. The panel tells you what it tried and what it got back, and that message is nearly always the answer.
What comes next
If you came here to set up a real project, you are done: open your team's repository and the DevOps Pipeline panel will tell you the rest.
If you are taking the course, Lab 1.2 builds you a small environment to work in: one free Salesforce org, three scratch orgs created from it, a copy of the project, and a pipeline. It is the last of the setup.
Go deeper
Next: Lab 1.2 - Create your Dev Hub, scratch orgs and CI/CD pipeline