Level 1 - Salesforce DevOps contributor basics
Time: about 2 h 15, in one sitting or seven.
Before you start: nothing. This is the first level.
The story
You joined Helios Energy on Monday. They install residential solar panels across southern Europe, sales runs on Salesforce, and the delivery crews track every installation in a custom app called Helios Delivery.
The team already has a pipeline. There is a Git repository, an integration org, a Pull Request check that deploys your work before anyone reviews it. Nobody is going to teach you Git: the VS Code extension does the technical part, and by Friday you are expected to have delivered your first story.
That is this level.
Six words, before anything else
If you have never used Git, this is the whole vocabulary. Nothing in Level 1 assumes you knew it beforehand, and you will not have to type a single Git command: the VS Code extension does that part.
| Word | What it means |
|---|---|
| Repository | One project folder, plus every version of it there has ever been. Often shortened to "repo". The Helios repo lives on GitHub. |
| Fork | Your own copy of somebody else's repository, made in one click, under your GitHub account. You can change anything in it, and the original never notices. |
| Clone | Downloading a repository onto your laptop, so VS Code can open it. |
| Branch | A named line of work inside a repository. You change what you need on yours, and the team's version stays untouched until you merge. |
| Commit | Recording a set of changes in the repository's history, with a message saying why. |
| Pull Request | Asking for your branch to be folded into the team's. It is where the checks run and where a colleague reads what you did. Everyone says "PR". |
What you will do
| Lab | Title | Time |
|---|---|---|
| 1.1 | Install VS Code, Git and sfdx-hardis | 15 min |
| 1.2 | Create your Dev Hub, scratch orgs and CI/CD pipeline | 30 min |
| 1.3 | Start a User Story on its own Git branch | 10 min |
| 1.4 | Build a custom field in your Salesforce org | 15 min |
| 1.5 | Retrieve, commit and publish your Salesforce changes | 20 min |
| 1.6 | Open a Pull Request, pass the deployment check, merge | 20 min |
| 1.7 | Capstone: deliver a User Story on your own | 25 min |
The Training menu
Everything this course asks you to run outside the product's own buttons lives in one menu. Open the Welcome page, and under CUSTOM MENUS click the Training: Level 1 card. Its commands take over the page:
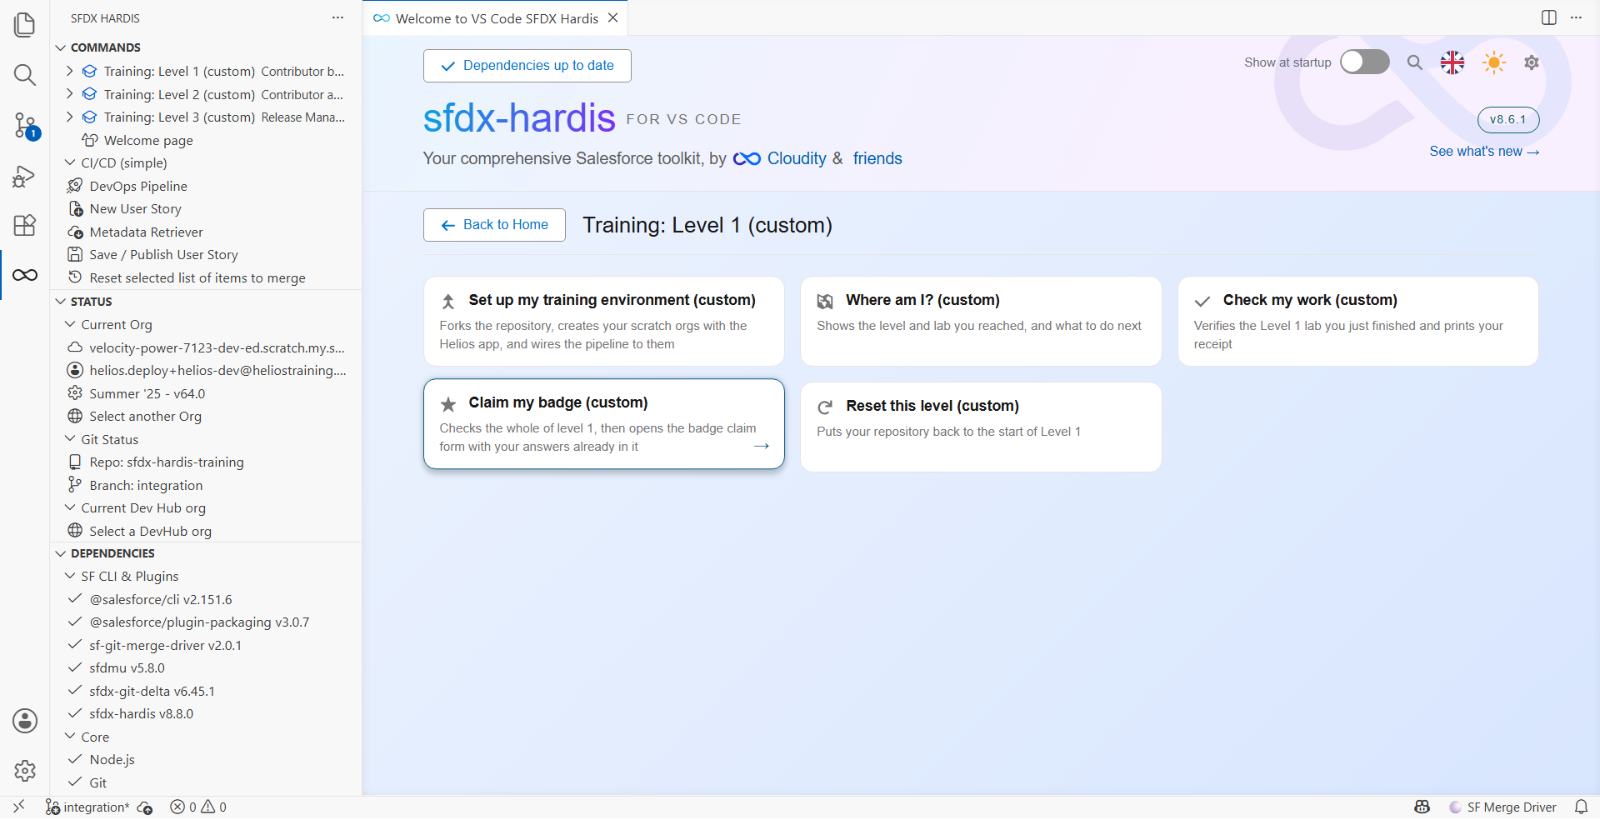
Five of them, and the labs call them by these names:
| Command | What it does |
|---|---|
| Set up my training environment | Forks the repository, creates your scratch orgs with the app, wires the pipeline |
| Where am I? | Says which level and lab you reached, and what to do next |
| Check my work | Verifies the lab you just finished and prints your receipt |
| Claim my badge | Checks the whole level, then opens your badge claim filled in |
| Reset this level | Puts your repository back to the start of Level 1 |
There is one menu per level, and each holds only what that level needs, so nothing in front of you is for a lab you have not reached.
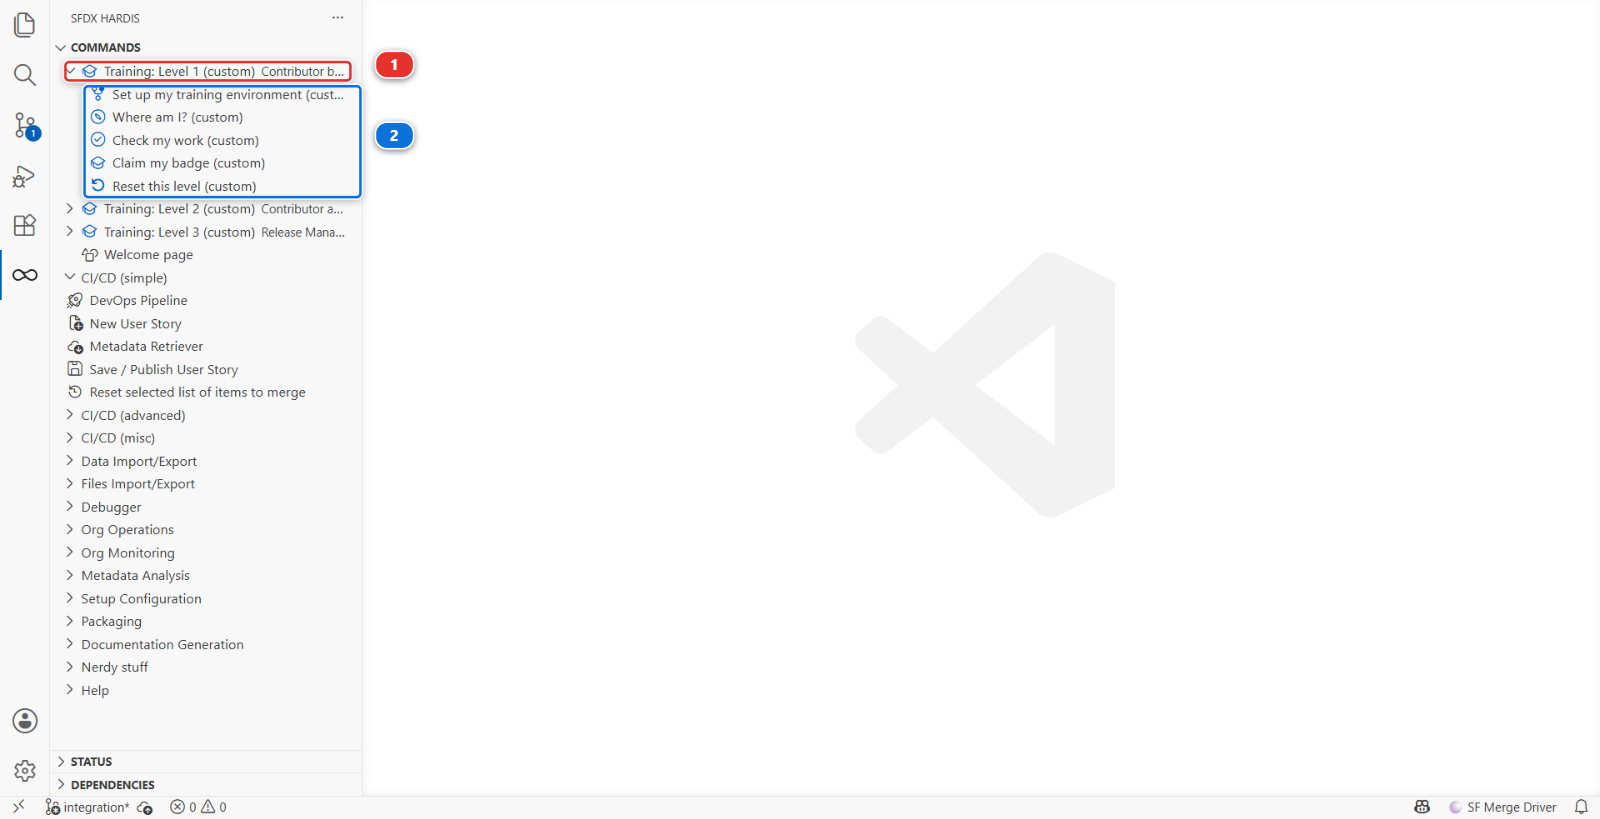
The same commands are in the SFDX HARDIS view of the left bar, under Training: Level 1 (1), one per line (2). Either route runs the same thing, and the labs name the Welcome page because a card is easier to point at than a row.
Three things that are true for the whole course
You work in your own copy. Everything in this course happens in a repository that belongs to you and nobody else. Your changes, your mistakes, your fixes, and nothing you do reaches anybody else's work. Lab 1.2 sets that copy up for you in one click, and explains why it has to be that way.
You click, you do not type. Every action in these labs is a button in the VS Code extension. Where a command appears, it is in an Under the hood block, which explains what the button did. You never have to retype it.
You can always start over. If a lab goes wrong, Welcome page > Training: Level 1 > Reset this level puts your repository back to the start of the level. One botched lab does not end your course.
If you get stuck
Every lab has an If it goes wrong section with the two or three failures we know happen. Beyond that, the sfdx-hardis documentation at sfdx-hardis.cloudity.com is the reference, and each lab links the exact pages for its topic.